Pendrive is a great idea that has made our life very easy. However, if we use it for important or confidential documents, its security also leaves much to be desired. Anyone who finds a USB stick can open it and see what’s on it, as well as erase its contents. Is it possible to put any restrictions on this? One of the easiest ways to do this is to protect it with a password. Here, we tell you how to put password on usb flash drive.
How to put password on usb flash drive?
Protecting documents on a USB flash drive is very simple. It will be enough to put a password so that only you can access the documentation that is in this USB memory. To do this, follow these steps:
Step 1
Windows includes its own system to put a password to devices such as a Pendrive, so you will not have to download any extra software. The program is Bitlocker, which encrypts the memory units you specify. To access it, go to Start and, in the search engine, type “Bitlocker” without quotes. Hit Enter.

Step 2
Four results will appear within the Control Panel: BitLocker Drive Encryption, Manage BitLocker, Manage File Encryption Certificates and Protect Your Computer by Encrypting Data on Disk. The one that interests us is “Manage Bitlocker”, so double click on that option to access. You can read: Why Computer Won’t Turn on? Reasons and Solutions Step by Step
Step 3
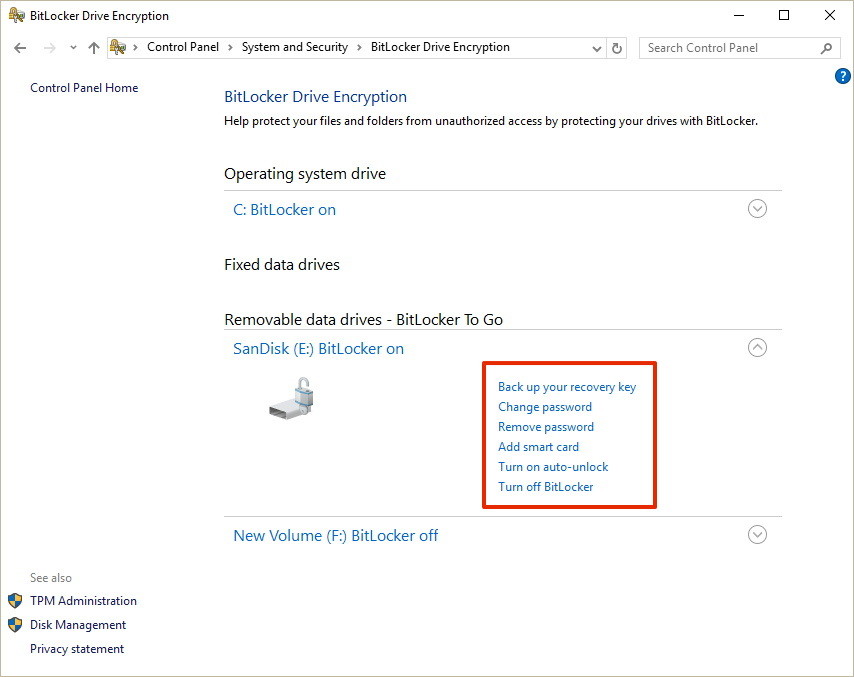
On the next screen, you will see all the drives on your computer so that you can select the one that interests you to encrypt it. This encryption will make the units you select can be seen and used only by authorized users, that is, users with a password. The last drive will appear under the heading “BitLocker Drive Encryption: BitLocker To Go” and is the one that refers to removable drives. Insert the Pendrive if you haven’t already done so and click on “Activate BitLocker” next to the drive. Keep reading lucky patcher ios

Step 4
The encryption process will begin, during which BitLocker will be installed on that USB drive. Be patient, because the process can take a few seconds, and do not remove the Pendrive from the USB port while the installation is taking place. When it’s done, it will automatically take you to the next screen.
Step 5
The next screen is where you select which method you prefer to unlock the unit. Since you want to protect the USB stick with a password, check the Use a password to unlock the drive box. Then enter the password twice in the fields below and click Next.
Step 6
We are almost done. It only remains to make sure that you can access the unit even if you forget the password, something you can do through a recovery key. On the next screen, click on “Save the recovery key to a file”. Explorer will open: name the file (try not to be “key”) and save it in a folder.

Step 7
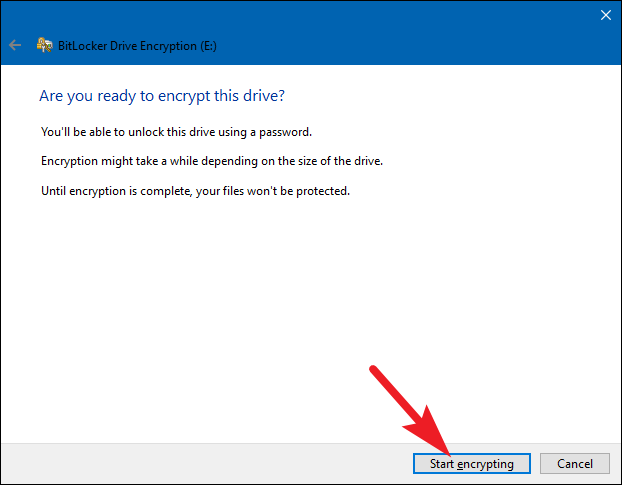
You will return to the recovery key screen. As you have already saved the file, click on the “Next” button, which will take you to the final screen. In it, they will ask you if you are ready to start the encryption and warn you that the process may take a few minutes. Click “Start encryption” to start the process.
Step 8
Be patient. If you have many files on the Pendrive, the process can take several minutes. When finished, click the “Close” button. To check that everything has worked well, remove the USB and reconnect it: the system will ask you for the password to be able to access the contents of the Pendrive.
